Showing posts with label Birthdays. Show all posts

Thursday, September 4, 2014

Turning 35

There were alot of good things about 34, but it was also a really growing/stretching year for me.  I'm ok to see it behind me, and honestly shocked that I sit here today at 35.


I was thoroughly loved on this past weekend.  There was a fondue dinner with my closest friends, lavished on with gifts and laughter.  There was dinner the following night at a friends house while our kids played.  Brunch on Monday (my actual birthday), with cinnamon buns made by my brother.  Naptime saw me doing some school prep, but also winding yarn for a project just for me.  Playground and river visits, home for more cake made by a friend and decorated by my kids.  It was a full rich day and left me with a full and grateful heart.


We are two days in to the new school year, and if the past two days are any indication, this year is going to be really great.  I'm happy to leave the challenges of 34 behind me, and embrace a year of new ahead.


Tuesday, September 2, 2014

Goldilocks Tunic


For my daughters second birthday, I dug deep into my yarn stash, and found some Shibui Knits Kiwi yarn.  It was originally destined to be a shawl (to be honest half is knit into a shawl), but that project was never going to see completion.  So I took the remaning skeins, and though bright, thought they would look great on her.

The Goldilocks pattern has just under a medium difficulty rating on Ravelry, and I would agree.  The pattern is quite confusing at the beginning, and only offers initial help in getting started.  After a little bit, I soon started to figure it out and find a rhthym, but I wouldn't recommend it to a knitter just starting out on garments, or on faux cabling.  There is still one section under the arm I'm not convinced is done properly, but noyone knows that but me (and maybe you if you can tell from the photos!).

Mods I made:

I knit the dress to 10.5” before doing the mock cables on the bottom.  
After the increase rows on the back I did a row of mock cables. I love the way it turned out.
I also added mock cables on the sleeves. I picked up a total of 50 stitches for each arm.


I'm a love gifter.  As most craft people would say (I assume), that one way they show love is by giving of their handicrafts.  I would never have thought that one of my kids would end up potentially (because I'm not giving up hope!), not being knit-worthy.  

I finished up that knit, lovingly tucked it into a gift bag, and waited for the moment she would open it, envisioning her asking to wear it right then.  And it sort of worked like that.  She opened it, tried to put it back in the bag, I encouraged her to put it on, she did.  For a mere second or two.  Then tried to rip it off.


Oh the craft heart broke a bit.  My eldest tried to reason with her.  We went on a bike ride instead in the clothes the little actually wanted to wear.  I tried the next day.  She would throw the tunic across the room.  I'm as stubborn as she is.  So I emptied all her drawers leaving only the tunic, and a choice of leggings.  (Crazy, perhaps, but determined).

She went to her dresser, opened the drawer.  Closed it.  Opened the next "nothin there!" she said.  Open, close, open close.  Then the tears started.  She left the room diaper clad.  Tried to put on her sisters clothes.  I put that tunic on her.  Showed her how nice it was.  We praised her all day long about that dress.


I got some good photos.  Not sure if she will ever wear it again.  But it was worn for one glorious day.

I had plans to knit her sweaters for the Fall, but I think I might need to stick to hats.  Hats seem safe.

Friday, August 22, 2014

Pinata Cake!

My littlest just turned two, and I turned to the internet for some inspiration for her cake.  She has a rainbow dress that she loves, paired with rainbow tights (she dresses herself and has a strong opinion on clothes!).  A Google search on "Rainbow Cake" brought back this amazing pinata cake.  

I'm not sure who was more excited.  Me or my middle about candy spilling from the centre.  For no particular reason I settled on Gummy Bears.  He particularly wanted gum balls :) The rainbow and bears kind of made me nostalgic for the eighties and the Care Bears ;)

A few days before the party, I decided that if the outside was rainbow, perhaps the inside should be as well.  I used this Funfetti homemade cake recipe.  It was fantastic.  I made the cake on Friday and it was served on Sunday afternoon.  Even two days after the party it was still super moist.  Only change I would do, is the sprinkles could probably be cut in half.  I made three batches of it so I could make a double layer of the 9", as well as a dozen cupcakes.  The rainbow cake served all of our guests - 13 adults and 9 kiddos leaving the cupcakes for us to eat at home after the party was done.  The sprinkle amount you will need (as called for in the recipe) is one complete jar per batch.


After putting the gummy bears in, and finishing up the cake, I kept it stored in our undeveloped basement for the two days prior to the party to keep it cool.  I wasn't sure how the gummy bears would fair in the fridge.


Here's the finished cake (with the name smudged out).  I used Twizzlers Rainbow licorice for the front, and regular marshmallows cut into quarters for the clouds.  The birthday wish was piped on with Royal Icing.  The tiny marshmallows are a US speciality and are the Jet Puffed Mini Mallows.


The site said they recommended cutting it on the side so the candies would spill out.  Unfortunately that didn't work.  I have two theories on it.  One, the gummy bears are kind of sticky.  My son is probably correct that using gumballs or a hard candy would be better.  Second, I think my candy well wasn't deep enough.  A larger hole probably would have been better, as when the cake was cut the candies were kind of squished in.


 Once we got the cutting the center of the cake, THEN the bears spilled out.  No loss though, the kids were all thrilled with the candy in the cake, and my daughter was thrilled because it was CAKE!  I recommend this fun cake as well as the Funfetti cake.  Both were fantastic.

Wednesday, May 7, 2014

Happily Ever After Mitts

I didn't realize how fitting the pattern name of  these mitts would be to the owner!

My eldest turned 7 on Monday, and Sunday night found me frantically tucked away in our bedroom finishing up some fingerless mitts for her.

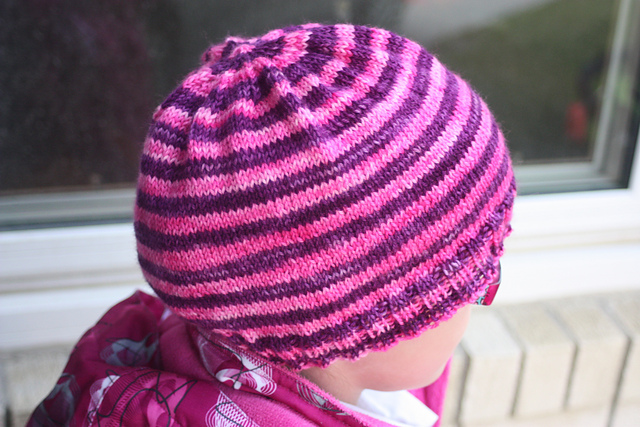
When she entered Grade 1, I knit her this hat - Happily Ever After by Susan Anderson using Studio Avenue Six Bellwater Sock yarn in the colorway Cheshire.  If I recall correctly I received it in a yarn kit, and it was perfect for my girl who loves purple and pink.  The hat only used a portion of the skein, so I figured accessories to match with the rest she would just love.


And she did!

From the moment she unwrapped the mitts, they only occasionally came off.  She wore them at breakfast, lunch, and dinner.

She wore them to the play center (she skipped school on her birthday).


She even wore them to bed.  On her birthday, and last night.

And they are being worn to school today.

These mitts are LOVED.

And I'm so so pleased :)

Thursday, February 13, 2014

Ravellenics Knitting

When my eldest turned 3, I knit her a birthday dress.  She coined it her "party dress", and has worn it to every birthday party she has attended, since the age of 3.  She will be 7 in May.  Thankfully the dress was meant to be worn for that long, going from dress to tunic, but it has had alot of love, and a new dress needed to be knit.
Brand new Birthday dress.  Age 3.
Wearing her birthday dress.  Age 6.

We picked out her favorite colours, pink and purple (do 5-7 year old girls ever love a colour other than pink and purple?), and a super cute pattern.  Check it out! (Image taken from designers page on Ravelry).


Still working on my monthly knitting challenges, this dress became the challenge for February.  I decided it was my #1, which was to knit something from my Favorite listings on Ravelry.  I added this one to that list back in June.  However, February also brings the Olympics, and with it Ravellenics.  Ravellenics in short, is a knitterly "competition" with oneself, to knit as many objects as you wish, during the Olympics, with "medals" given out by "Bobicus Maximus" (a cute dog image on Ravelry.  Not sure if he is an actual dog in real life).   So how do I fit in knitting for the Olympics, and also work on Grace's dress.  The only solution was to do the crazy, and try to knit her dress, start to finish, during the Olympics!


A few days before, I set about winding the balls of yarn into skeins, washing them to make sure there would be no dye transfer, drying them, then rewinding them into cakes (not the edible kind.  Cakes of yarn.  Knitting can be so deceiving).  


I've gotten through the body of the dress (a little concerned it will be too short, but hoping I can fix that by blocking), the seed stitch waistband (so sweet), and now onto inches and inches of plain stockinette.  Just over a week left in the Olympics, and I must say I'm feeling a bit like this may have been biting off more than I can chew.  But I'm giving it my best shot.  Here's where I'm at as of this moment:


I have about another 7 inches to knit straight, before I start on the edging.  

Big thanks for this post go out to my inlaws, who have taken the big two on a shopping trip, while the littlest naps, after also bringing me a Venti Caramel Macchiato.  They are here until Monday, and with their help with the kids, I may just be able to pull this off!


Monday, January 20, 2014

Lemon Meringue... Puddle?

It has become tradition (if doing something two years in a row makes a tradition?) of making my husband a pie on his birthday.  Last year was a blueberry pie from scratch.  I usually go the easy route of buying a pre-made shell.  Last year I did it all by hand and it was SO tasty.  This year I decided on Lemon Meringue.  My Mom can do it, so I can too... right?


FAIL.  It tasted like Lemon Meringue.  The meringue worked like meringue.  But the filling flopped, and turned to a pool on our plates.  I'm not sure where I went wrong.  The graham cracker crust?  That's my only  theory.  That the hot filling on top of  the graham crust, caused the crust to get soft and it turned into a pile of mush.  The recipe didn't call for a graham crust, but graham crusts are so tasty I couldn't resist.  I did bake the shell prior to adding the filling but?


Do you know?  Have you made a successful Lemon Meringue?  I'd like to try again if anyone has a recipe to share :)

Tuesday, January 14, 2014

The Ultimate Chocolate Layer Cake


Growing up my Mom had a subscription to Canadian Living Magazine.  I'm not sure if she actually used it for the recipes, but I remember reading through the recipes as the magazines came into our home.  When a friends child had a magazine subscription fundraiser come up last Fall, I had a "Mom moment" of subscribing to the magazine for myself.  Without realizing it, I have a few resolutions I've made, one of which is to make something from the magazine each month.  February's edition arrived last week, and in it a recipe for "Ultimate Chocolate Cake".  We have alot of birthdays we are celebrating this month, so I wrapped them all up into one big event.  What is more fitting to celebrate four people, than a four layer chocolate cake?


I started off trying to be sophisticated and added white chocolate shavings to the top.  Then I added sprinkles to a quarter of it for the 4 year old in the group.  The sprinkles were so fun I added them to the whole top.  Then A wanted bugs on it.  So 9 gummy worms were also added :)


It was a moist delicious cake, and one I know I will make again.  It was so good A even licked his plate :)

Ultimate Chocolate Cake

3C all purpose flour
2C sugar
2/3C cocoa powder
2tsp baking soda
1/2tsp salt
2C cold brewed coffee or water
1C veg oil
2tsp vanilla
3tbsp cider vinegar (this part scared me)

Mix flour, sugar, cocoa powder, baking soda and salt.  Mix in water or coffee, oil and vanilla.  Stir in vinegar.  Bake in 350F oven for 25-30 minutes.  Top with icing of your choosing :)

Monday, January 6, 2014

Finished Knit - Robot Hat

I'd apologize for all the birthday themed posts, but as my eldest says "A is so lucky!  He has the first birthday of the year!"  I love her perspective, and I love birthdays :)  Fortunate for you (ha!) you get a shwack of birthday posts to start out the New Year with.

One of the things I love to do for my kids on their birthdays, is to gift them something handmade.  I expect that this will only last a few short years before they decide that they are too cool for their Moms gifts.  But, as long as they will let me, a handmade gift will be given.


This year for A, I made him a new hat.  I realized I haven't knit him a hat since his 2nd birthday, and it was getting much too small.  A quick search on Rav for "Robot hat" came up with this gem.  I followed the mods other people had done for the child size, and cast on 92 stitches.  After completing the hat, I agree that the childs size would have been too big, but the 92 is a big snug on my boy with a 21" head circumference.  I would suggest adding in a few stitches in between the robots (and dropping the final robot) to give it a bit more room.

I was also a bit concerned about the length and blocked it quite aggressively.  I still would prefer it have a bit more coverage over his forehead.  My Mom gave a great suggestion this am of picking up stitches around the brim, adding a couple of inches, and folding it over.  I might just do this as I'd like him to get a couple years out of it.

Oh and can't forget the pompom.  The last pompom I made (and my first) was a disaster and fell apart.  That was about 5 years ago.  I thought this hat really deserved a pompom, and used this awesome tutorial.  It's a great sturdy pompom that I'm not worried will disintegrate from the top of the hat (ha!).  I held all the different colours together and wrapped around my fingers about 40 times.  I then shaped it quite a bit to made it nice and thick.

Best part is A loves it!

Sunday, January 5, 2014

Let there be cake!

Yesterday we celebrated our middle turning 4 (his actual birthday is on Monday).  This was his first friend party where he chose all the guests.  There were 6 kids from his preschool and two family friends.  Such a special special day.  The kids all did amazing with the Lego build (we had a company come in), and everyone enjoyed the cake.  I'm a bit timid sharing my creation here, but given it took me all day, I figured I would post it up :)


The idea came from a Betty Crocker tutorial, but once the cake was done, I figured I would try stacking them like A does his actual towers.  I also made two cakes (one chocolate, and one vanilla) so that I could make cupcakes for the parents.  With extra batter left, I used my mini loaf pan to make smaller Lego pieces.


The birthday boy loved it.  Even one of his guests who has never eaten cake, and claimed he didn't like cake, gave it a try and loved it :)


We still have about half leftover to celebrate with a second time tomorrow on his actual big day :)

Thursday, January 2, 2014

Lego Loot Bags

My middle will soon be turning 4, and he requested a birthday party this year.  We've always had one for him in the past, but this will be his first inviting friends from his preschool.  We've hired in a company to come and build Lego with the kids (I figure at the age of 3-5 it is best to have someone else responsible for controlling the kids lol).  My son ('A') LOVES to build so this is right up his alley.  He's been busy telling people he is having a 'block party'.

Today we set about making the loot bags.


I like to include the kids when it's something that is intended for their friends.  It adds for a bit more time and work involved, but they love being helpers.  My eldest who is 6.5 is becoming particularly good at helping with some of the more intricate tasks.  Today she added all the dots to the paper sacs to turn them into Lego bricks (I used a Stampin Up 1 1/4" circle punch, regular kids craft paper, and raised them up with foam dots).

A is just getting into drawing people, so I put him to work adding smiley faces to Lego heads I cut out of yellow craft paper.  While I got to work stuffing the items into the loot bags (Mega Blocks Smurf figurines, Lego stickers, a Minifigurine coloring page, and Candy Blox), A started cutting yellow paper.  He cut up an entire page and started adding them to the bags while saying his friends names :)  I loved that he wanted to do something all by himself for his buddies.


On the back of the Lego heads I wrote a little note thanking the guests for coming.  I think they turned out really cute and think A's friends will enjoy them :)